We’ve all been there – you install some new kind of software or just update your drivers to their newest version and something goes wrong. You see a Windows error that you’ve never seen before and you go in panic mode worrying if you can fix the problem. Fortunately, Windows 10 System Restore will help you to resolve the issue.
So, what exactly is Windows System Restore?
When something goes terribly wrong on your system, System Restore allows you to roll back your Windows to its last working state.
Restore points are snapshot of your current Windows file system, registry settings, hardware settings and certain program files. By enabling the Windows 10 System Restore , Windows makes a Restore Point once per week automatically and when some major event is happening – driver installation, new app or Windows Update.
You can also manually create restore points in case that you are about to do something that you think may break your system and you want to be on the save side and restore all of your settings to their previous working state.
For example, you decide that you will install a new software, but it makes your computer unstable or some errors show up. The most logical thing is to uninstall this software, but in some cases, you can’t remove the faulty installation. That’s where System Restore comes in play. By simply selecting a restore point before the installation of the driver, your system will be brought to the state where it was working properly.
One important thing that we should mention is that System Restore does not affect your personal files like photos, documents, saved emails etc. If you’ve just downloaded an important document from your email on your computer and by any reason your system crashes and you are forced to use System Restore, your downloaded file won’t be deleted, same rule applies for your files that you’ve created with other software.
Do we need to explicitly enable System Restore, and how?
Whether System Restore is enabled by default depends on the exact version of Windows you have installed. All versions from Windows XP up to Windows 8.1 should have System Restore automatically enabled for the system drive. With Windows 10, System Restore should be enabled in earlier revisions, however, in later ones the feature is disabled. If you want add another layer of protection that would allow you revert back to an earlier state after a problem arises, make sure System Restore is on. If you decide you want System Restore enabled, you can safely leave it on only for your system drive.
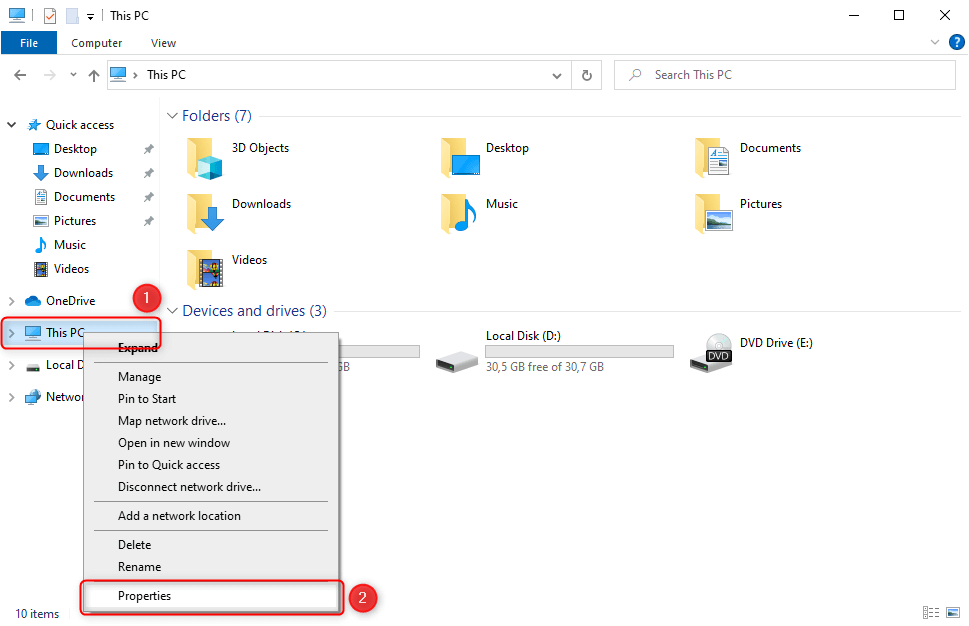
In order to turn on Windows 10 System Restore, press WinKey + E on your keyboard. A Windows Explorer window will pop where you have to right click on This PC and select Properties.
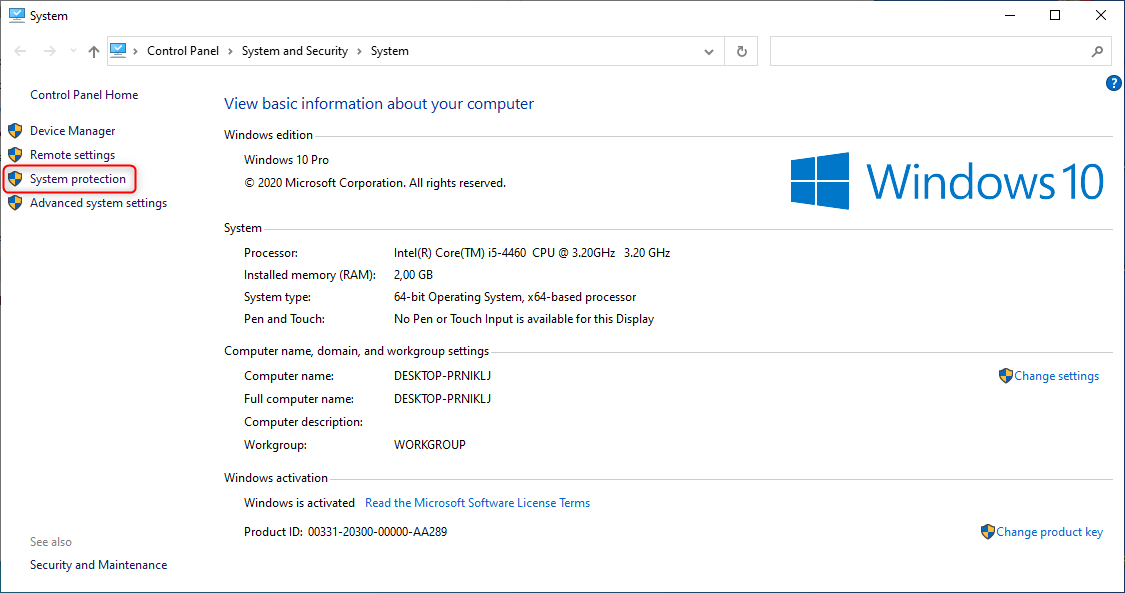
After that navigate to the left side of the window and click System protection
Navigate to the System Protection tab.
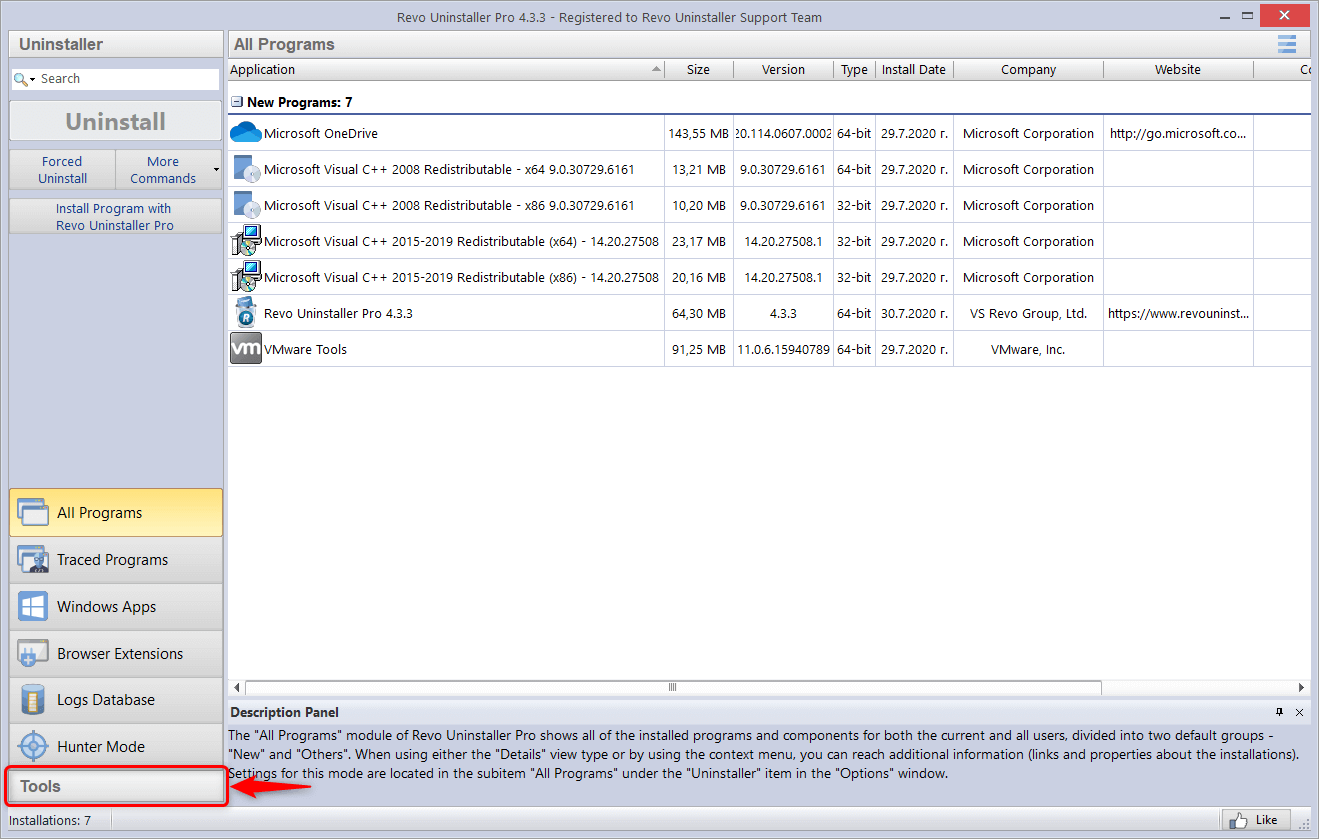
Another easy way to access the System Restore is through Revo Uninstaller Pro.
Once you open the software click on Tools
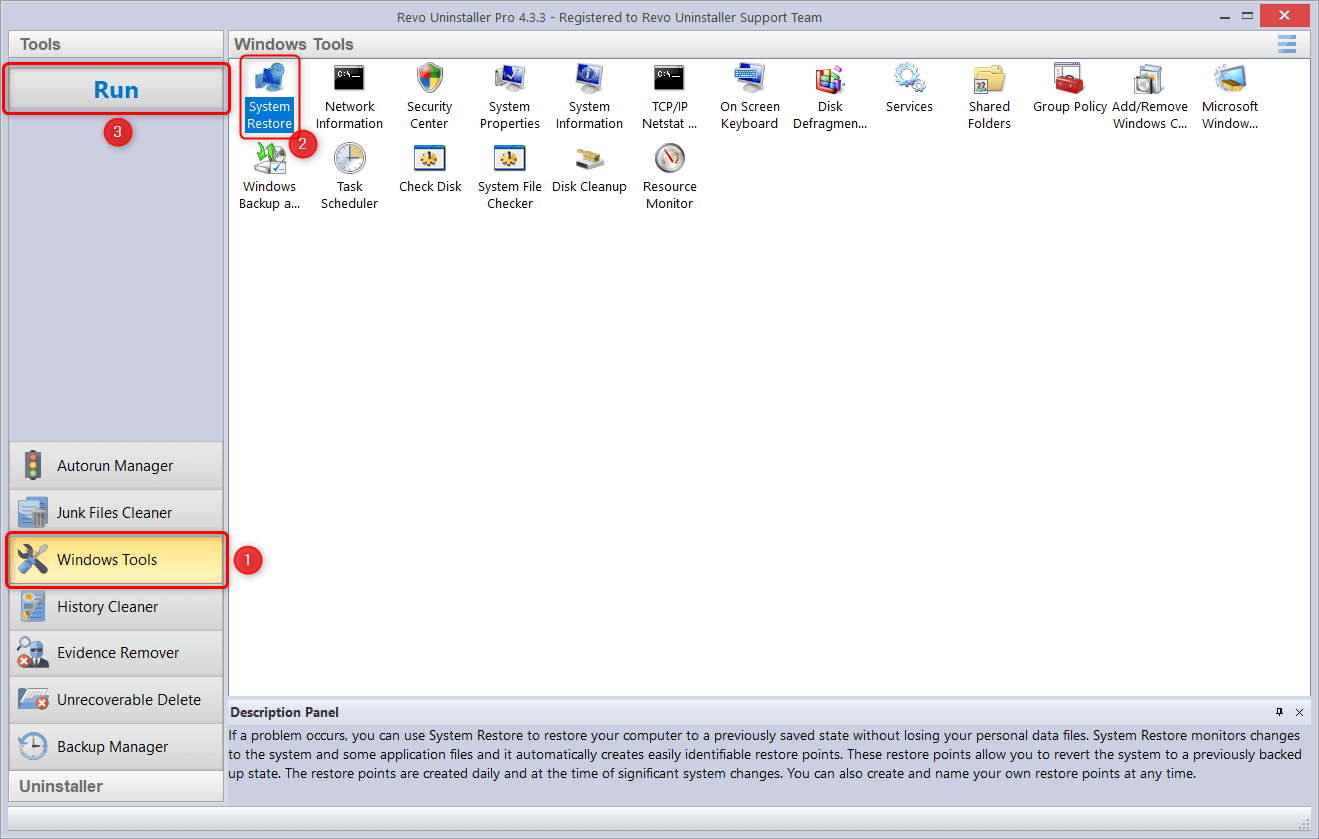
After that navigate Windows Tools , select System Restore and click Run
From there click System Restore Point and follow the instructions below
You will see a list of drives and from it select the one that you want to enable System Restore on and click Configure
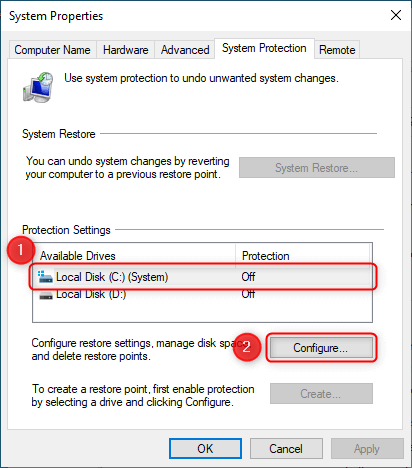
Select the Turn on system protection option, and click OK.
Revo Uninstaller Pro by default creates a Restore Point before you perform an uninstallation. The creation of the Restore Point is meant as an extra layer of security in case a problem arises. By doing this you always have the means to restore your system to its previous working state.
How to restore your system to its previous state
Now that you are knowledgeable of how to create System Restore Points and that you have to create them every time you are doing something major on your system or you are just playing around with something , lets’ see how exactly you can use it to reverse any potential system errors.
So one sunny day you decide to install this new software that everyone is talking about. Unfortunately the worst happens and you see that something is terribly wrong with your system. You have to restore it to an early restore point, so your computer can start running again.
First you will start by navigating again to the System Protection tab and click System Restore
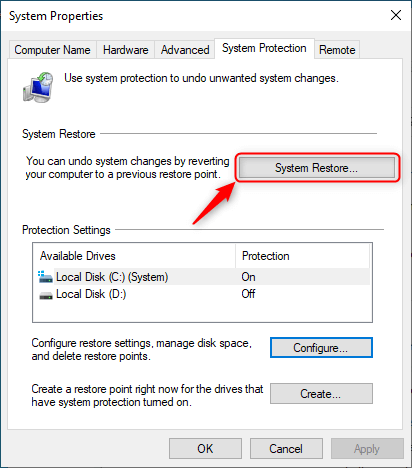
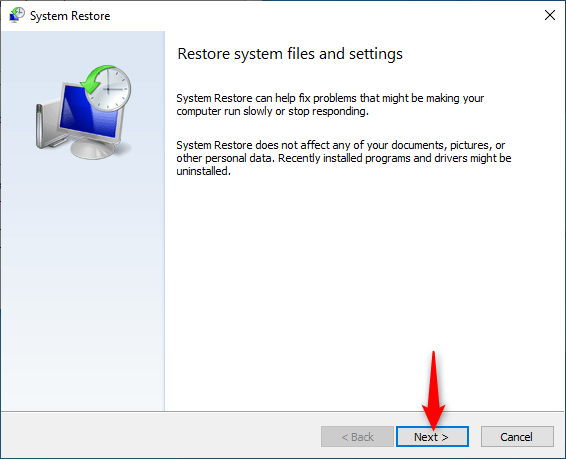
On the next screen that pops click Next
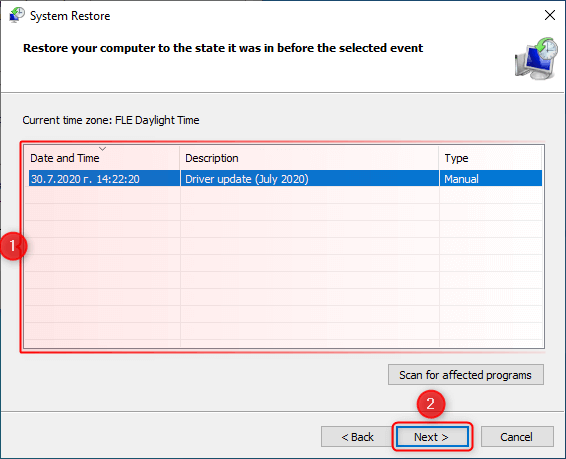
After that you will see a list with your most recent Restore Points and you have to select the one that suits your needs. After that select the desired Restore Point and click Next.
On the next screen you will see information about the whole process. If you’ve never used System Restore please be sure that you read all the information very carefully. When you are ready click Finish.
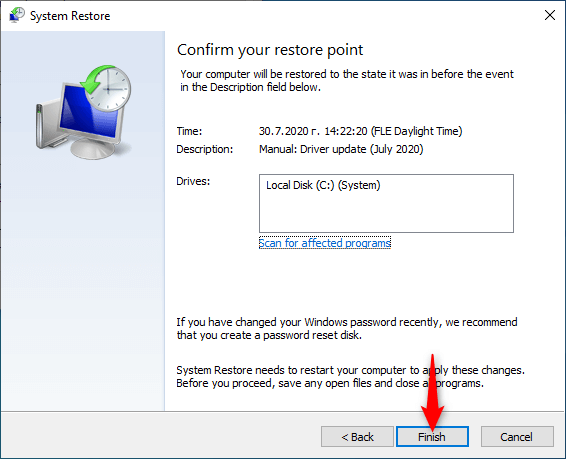
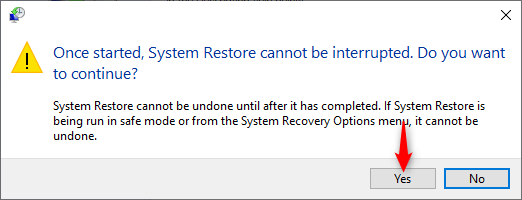
This is the last chance if you want to cancel the process. If you are certain of your actions , simply click Yes.
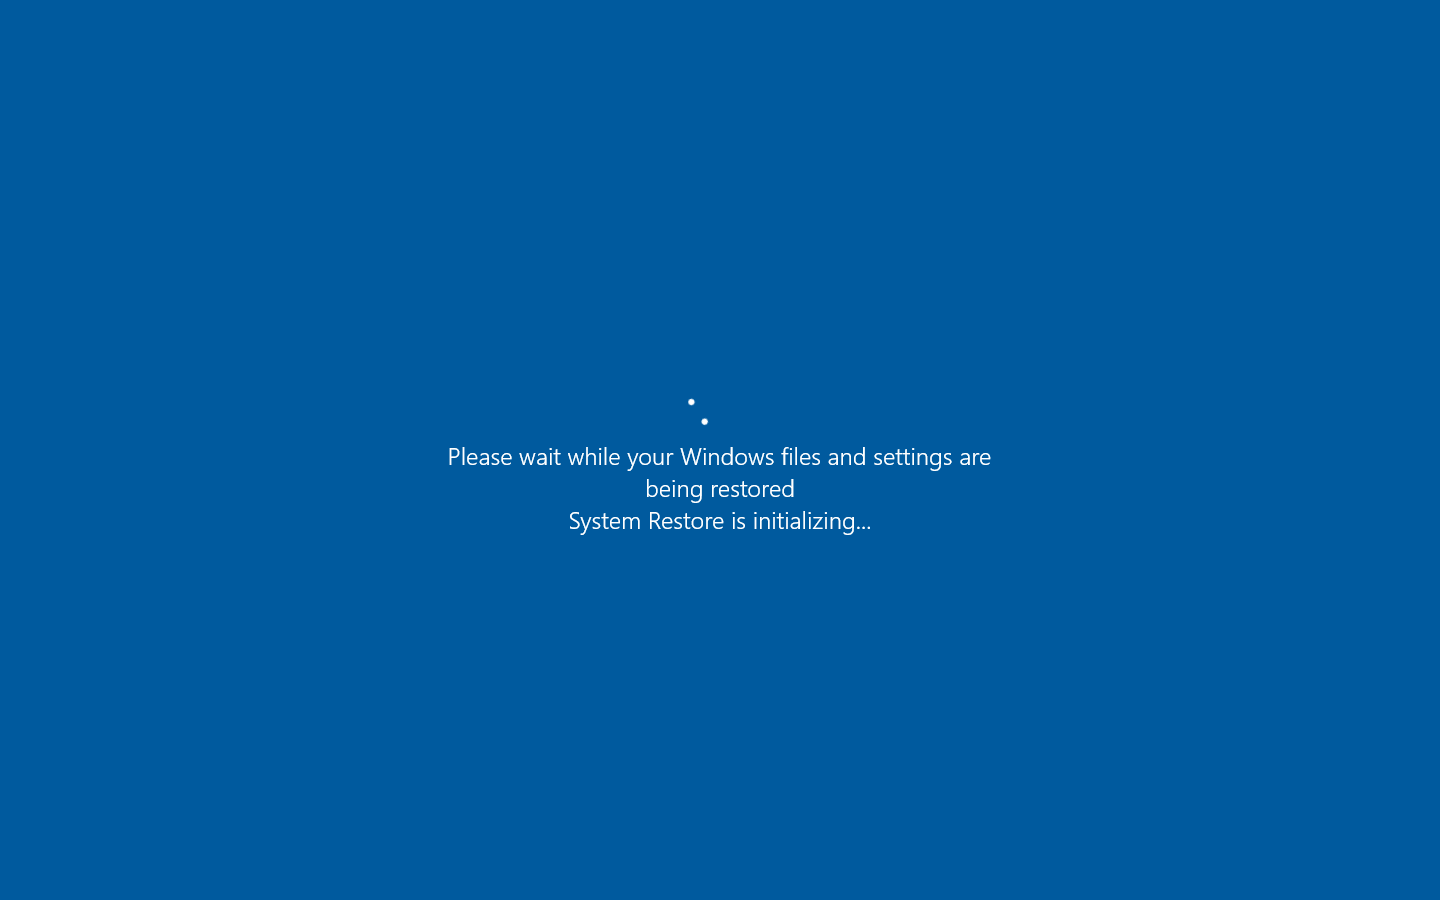
On the next stage of the process your computer will reboot and all the changes from the restore point will be applied.
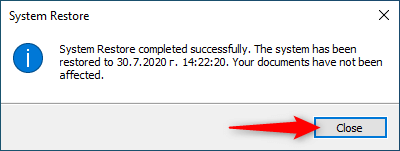
After this your Windows will load and a simple information window will open with a short summary. You can simply close it.
Overall System Restore is a pretty handy and an easy accessible tool with Revo Uninstaller Pro developed by Microsoft that provides you with the means to have a safety boat in case something goes terribly wrong with your system.

No Comments